Chapter 1
Setting Up
This chapter takes you from a Commodore 64 sitting on a desk to a working c64cast installation that reliably talks to it. If you followed the Quick Start you have already done some of this; the rest fills in what was skipped and explains why each piece is there.
What You Need#
c64cast writes directly into your Commodore's memory. It cannot do that through the cartridge port alone, so it needs a device in the machine that speaks to the outside world. Two families are supported.
The Ultimate Platform#
The Commodore 64 Ultimate, or C64U, is the most modern version of the Ultimate platform and the machine this guide is written against. It connects over Ethernet or Wi-Fi, it provides HDMI output, and it has the fastest link, which matters when you are pushing thirty frames a second.
Several products are the same platform under different names. This guide uses "C64U" throughout to mean any of them, because they function in essentially the same way:
- Commodore 64 Ultimate (C64U) — the current machine, and this guide's reference.
- Ultimate 64 and Ultimate 64 Elite — earlier boards of the same
platform. Often shortened to U64, which is also where the
u64://connection scheme gets its name.
The Ultimate II+ is a cartridge rather than a complete machine. It provides much of the same functionality, and most of this guide applies to it unchanged, but it is not 100% compatible with every feature. Where a difference matters, the text says so.
Newer Ultimate firmware unlocks a few extras; the Programmer's Reference lists which, in "What Each Firmware Can Do".
The Other Path#
The TeensyROM+ connects over USB or over your network. It works well and is a good deal cheaper, but it is a narrower pipe and some features are unavailable on it. The text flags these as they come up.
And a Computer#
You also need a computer to run c64cast on, and a network path between it and the Commodore. Wired Ethernet is noticeably steadier than Wi-Fi for this; the traffic is many small writes rather than a few large ones, so latency matters more than bandwidth.
Enabling the Network Services#
A C64U ships with the services c64cast needs switched off. Turning them on is a one-time job.
- Open the C64U menu: press the Multi Function Switch upward. On an Ultimate II+ cartridge, press the menu button on the cartridge instead.
- Press F2. This opens Advanced Settings, where the rest of the machine's configuration lives.
- Under Network Settings, set Ultimate DMA Service to Enabled.
- In the same menu, set Web Remote Control Service to Enabled.
- Back out, go to Memory Configuration, and set Command Interface to Enabled.
- Press RUN/STOP to leave the menus. The C64U asks whether to save your changes; say yes.
Three switches, three different jobs, and it is worth knowing which is which because the failure modes look nothing alike.
The Ultimate DMA Service is the fast path. It is a plain socket on port 64 that accepts memory writes. Every pixel c64cast puts on your screen goes through it. Without it, nothing works at all.
The Command Interface gates the DMA service's command dispatcher. This one catches people out: with the DMA Service on and the Command Interface off, c64cast opens the socket successfully and then waits forever for a reply that never comes. If your first run connects and then simply hangs, this is almost certainly why.
The Web Remote Control Service is a separate service on a separate port, handling the things a raw memory write cannot do: resetting the machine, starting a native program, and launching SID tunes. Scenes that only paint pixels will work without it. Scenes that start something running on the Commodore will not.
If a firewall sits between your computer and the Commodore, allow outbound TCP to port 64 and port 80 on the Commodore's address.
Give It an Address That Does Not Move#
While you are in Network Settings, do yourself a favor and pin the address down. c64cast is much easier to live with when the C64U is always in the same place: you can save the connection target once and never type it again.
Set Use DHCP to Disabled, then fill in Static IP along with the netmask, gateway and DNS address for your network. Choose an address outside the range your router hands out automatically. With DHCP disabled the firmware's own default address is 192.168.2.64, which is the address used in the examples throughout this guide.
If you would rather leave DHCP on, reserve an address for the C64U on your router instead. Either way the goal is the same: an address that survives a reboot.
If Your C64U Has a Password#
A C64U can be configured to require a password for network access (F2 → Network Settings → Network Password). The one password guards both of the services c64cast uses, the DMA socket and the web remote control, and c64cast sends it to both. It reads it from an environment variable:
export C64CAST_DMA_PASSWORD='your-password'You can also put it in a configuration file, but the environment variable is better and takes precedence when both are set. There is deliberately no command-line flag for it: anything you type as an argument ends up in your shell history and is visible to anyone who can list processes on your machine.
If Your TeensyROM+ Lives in an Ultimate#
A TeensyROM+ works in any Commodore 64, and that includes a C64U or an Ultimate 64: the Ultimate supplies the machine, the TeensyROM+ supplies the link. That pairing needs one setting changed on the Ultimate side; without it, what you play may come out with a steady hiss underneath.
Open the Ultimate's menu, press F2, and under Cartridge and ROM Settings set Bus Operation Mode to Writes. Press RUN/STOP to back out, and say yes when it offers to save.
The setting governs how much of what the machine does reaches the cartridge port. Its default, Quiet, keeps that port quiet; Writes — or Dyn. & Writes, which includes it — is what the TeensyROM+ needs. Ultimate 64 firmware 3.15 adds a fifth choice, Compatibility, which also includes writes; Writes remains the tested setting. This one is worth doing before you go looking for an audio option, because there isn't one: no amount of shaping in c64cast will clear a hiss that comes from the bus.
Installing c64cast#
c64cast is a Python program, but you do not have to think of it as one. It installs as a self-contained command-line tool, in its own private environment, and nothing it depends on lands in your system Python.
The recommended way is uv, a single-binary tool that installs Python programs and, if your machine has no suitable Python, supplies one itself. Install uv by whichever method its own installation page recommends for your operating system, then:
uv tool install 'c64cast[all]'That is the whole installation. It puts a c64cast command on your PATH, which you can confirm:
c64cast --versionAnd if you want to try c64cast without installing anything permanently, uv will fetch it, run it once and throw it away:
uvx --from 'c64cast[all]' c64cast \
    --config example:hello -u u64://192.168.2.64
What [all] Means#
The [all] part asks for every optional feature: video file decoding, links to video sites, microphone capture, MIDI, hand gestures, the LED bridge, the web control service, the browser console and the configuration wizard. Some of those are large, so plain c64cast without the brackets installs a much smaller core that still covers every generative scene, both bitmap and character rendering, SID playback and all the overlays.
While you are finding out what c64cast does, take [all]. It saves a great deal of confusion about why a feature appears to be missing. You can always narrow it later, or add features one at a time:
uv tool install 'c64cast[video,midi,web]'Upgrading#
c64cast --upgradeThat is the whole thing, nearly always. It works out how you installed c64cast — uv tool, pipx, plain pip, or a development checkout — and runs that installer's own upgrade command, so you never have to remember which one applies to you. It asks before doing anything (--yes skips the prompt for a script) and keeps whichever optional features you already installed.
An install has an hour to finish before --upgrade stops it, which is long enough to download a release that moved a large dependency, or to build one from source on a small single-board machine. If yours is slower than that — a very thin link, or a host with no prebuilt wheels at all — set C64CAST_UPGRADE_TIMEOUT_S to a larger number of seconds, or to 0 for no limit. If a run ever is stopped, it says so and says that the upgrade may be only partly applied: re-run the same command to finish it.
To ask without touching anything, c64cast --check-for-updates reports whether a newer release exists and stops there. Add --write-state and it also records the answer to disk, which two other surfaces read without ever querying PyPI themselves: --serve's web console shows a dismissible banner naming the release, and c64cast --motd-line prints the same thing (or nothing) for a login script. Nothing here ever installs anything on its own — that is still what --upgrade is for.
The rest of this section is about what --upgrade does under the hood, and the one way upgrading goes wrong even with it.
c64cast is not a folder you keep up to date. It is a command that lives in its own private environment, and the c64cast on your PATH points into that environment from wherever you happen to be standing. So downloading a release and unpacking it into your working directory upgrades nothing at all: it leaves a copy of the source sitting next to your configuration, and the command goes on running the version it was already running. c64cast --version will go on reporting the old number, correctly, because it reads the version of the installed package and not of whatever files happen to be nearby.
--upgrade sidesteps that trap by acting on the install it finds rather than asking you to identify it — but if you'd rather run the underlying command yourself, --version still names it:
c64cast 0.3.0 (/home/you/.local/share/uv/tools/c64cast/lib/python3.13/site-packages)The path names the environment the command actually runs from, and on the way past it names the tool that owns it: uv/tools/ here means uv tool upgrade c64cast, pipx/venvs/ means pipx upgrade c64cast.
Optional features do not accumulate. --upgrade keeps whichever extras you already have — it does not add one a release just introduced. If you want a feature that's new, name every extra you want in a single command and let it overwrite what is there:
uv tool install --force 'c64cast[all]'The quotes are for the shell's benefit, not c64cast's — some shells treat square brackets as a pattern to match against filenames. Quoted, the line is safe to paste into any of them.
Then check what you got, before any hardware is involved:
c64cast --version
c64cast --doctor --skip-probe
Doctor reads your configuration and reports which optional features the running install can import, without touching the C64 — the quickest way to see both that the upgrade landed and that your existing configuration still loads. Anything a release actively needs you to do is at the top of its notes on the releases page, under Upgrade notes.
One last thing, if you gave your configuration the #:schema line from Chapter 2. Written the way that chapter recommends, it names the schema inside your install, so upgrading updates it too and there is nothing to do. Written as a web address with a version number in it — the form older versions of this guide suggested — it stays behind, and your editor goes on checking the file against the release you first installed. --doctor reports that, and prints the line to replace it with.
Choosing Your Connection Target#
One option tells c64cast both what kind of hardware you have and where to find it. It is -u, and it takes a URL-like string whose scheme picks the backend:
| Target | Means |
|---|---|
u64://192.168.2.64 |
A C64U at that address |
http://ultimate-64.lan |
The same thing by hostname; the C64U is the only hardware that speaks HTTP |
tr:// |
A TeensyROM+ over USB, found automatically |
tr:///dev/cu.usbmodem1234 |
A TeensyROM+ on a specific serial device |
tr://COM3 |
The same, on Windows |
tr://192.168.2.70 |
A TeensyROM+ over the network |
The rarer settings ride along as query parameters, so they never need options of their own:
c64cast -u 'u64://192.168.2.64?dma_port=64' clip.mp4
c64cast -u 'tr:///dev/cu.usbmodem1234?baud=2000000' clip.mp4
If you set the C64CAST_URL environment variable, c64cast uses it whenever you do not pass -u explicitly.
Saving Your Settings#
Typing your Commodore's address into every command gets old immediately. Run any command once with --save-settings and c64cast writes the machine-specific parts of it to a settings file in your home directory:
c64cast -u u64://192.168.2.64 -d "HD Webcam" \
    --sid-model 8580 --save-settings
That records the connection target, the webcam device and the SID model, then exits without running anything. -d and -D match on any part of a device's name, so you never have to remember which number a camera happened to get; c64cast --list-devices shows what is attached. From then on, every c64cast command on this computer starts from those values, including the no-configuration quick playback from the Quick Start:
c64cast clip.mp4Settings saved this way sit underneath everything else. A configuration file overrides them, and an option typed on the command line overrides that, so saving a default never traps you. The password is never written to the file, whatever else you pass.
The Character ROM#
Your Commodore draws text with a font baked into a chip on its board — the character ROM. c64cast needs a copy of it, because everything it puts on screen as C64 text is drawn with those glyphs: scrolling messages, the big demo-scene scroller, the on-screen menu, the labels on the oscilloscope, and the preview window on your computer.
You do not have to go and find one. The first time c64cast runs against a machine, it reads the character ROM out of the C64 sitting in front of you and keeps it in your data directory. It takes about a second, it happens once per machine, and every run after that picks it up. Nothing is downloaded and nothing is shipped with c64cast — the font travels from your hardware to your disk and stops there.
If you ever want to do it deliberately — after fitting a different character ROM, say — ask for it:
c64cast --dump-char-romAnd if c64cast cannot read from your particular setup, hand it a copy you already have. This needs no hardware at all:
c64cast --install-char-rom /path/to/chargen.binBoth check that what they were given really is a character set before saving it, so a wrong file is refused rather than quietly making your text worse.
Checking Everything with Doctor#
When something is not working, ask c64cast what it thinks is wrong:
c64cast --doctorDoctor checks your environment, your configuration and your hardware, and reports everything it finds rather than stopping at the first problem. It verifies that you are running the interpreter you think you are, that the required libraries import, that your optional extras are installed, that your configuration file makes sense, and that the Commodore answers.
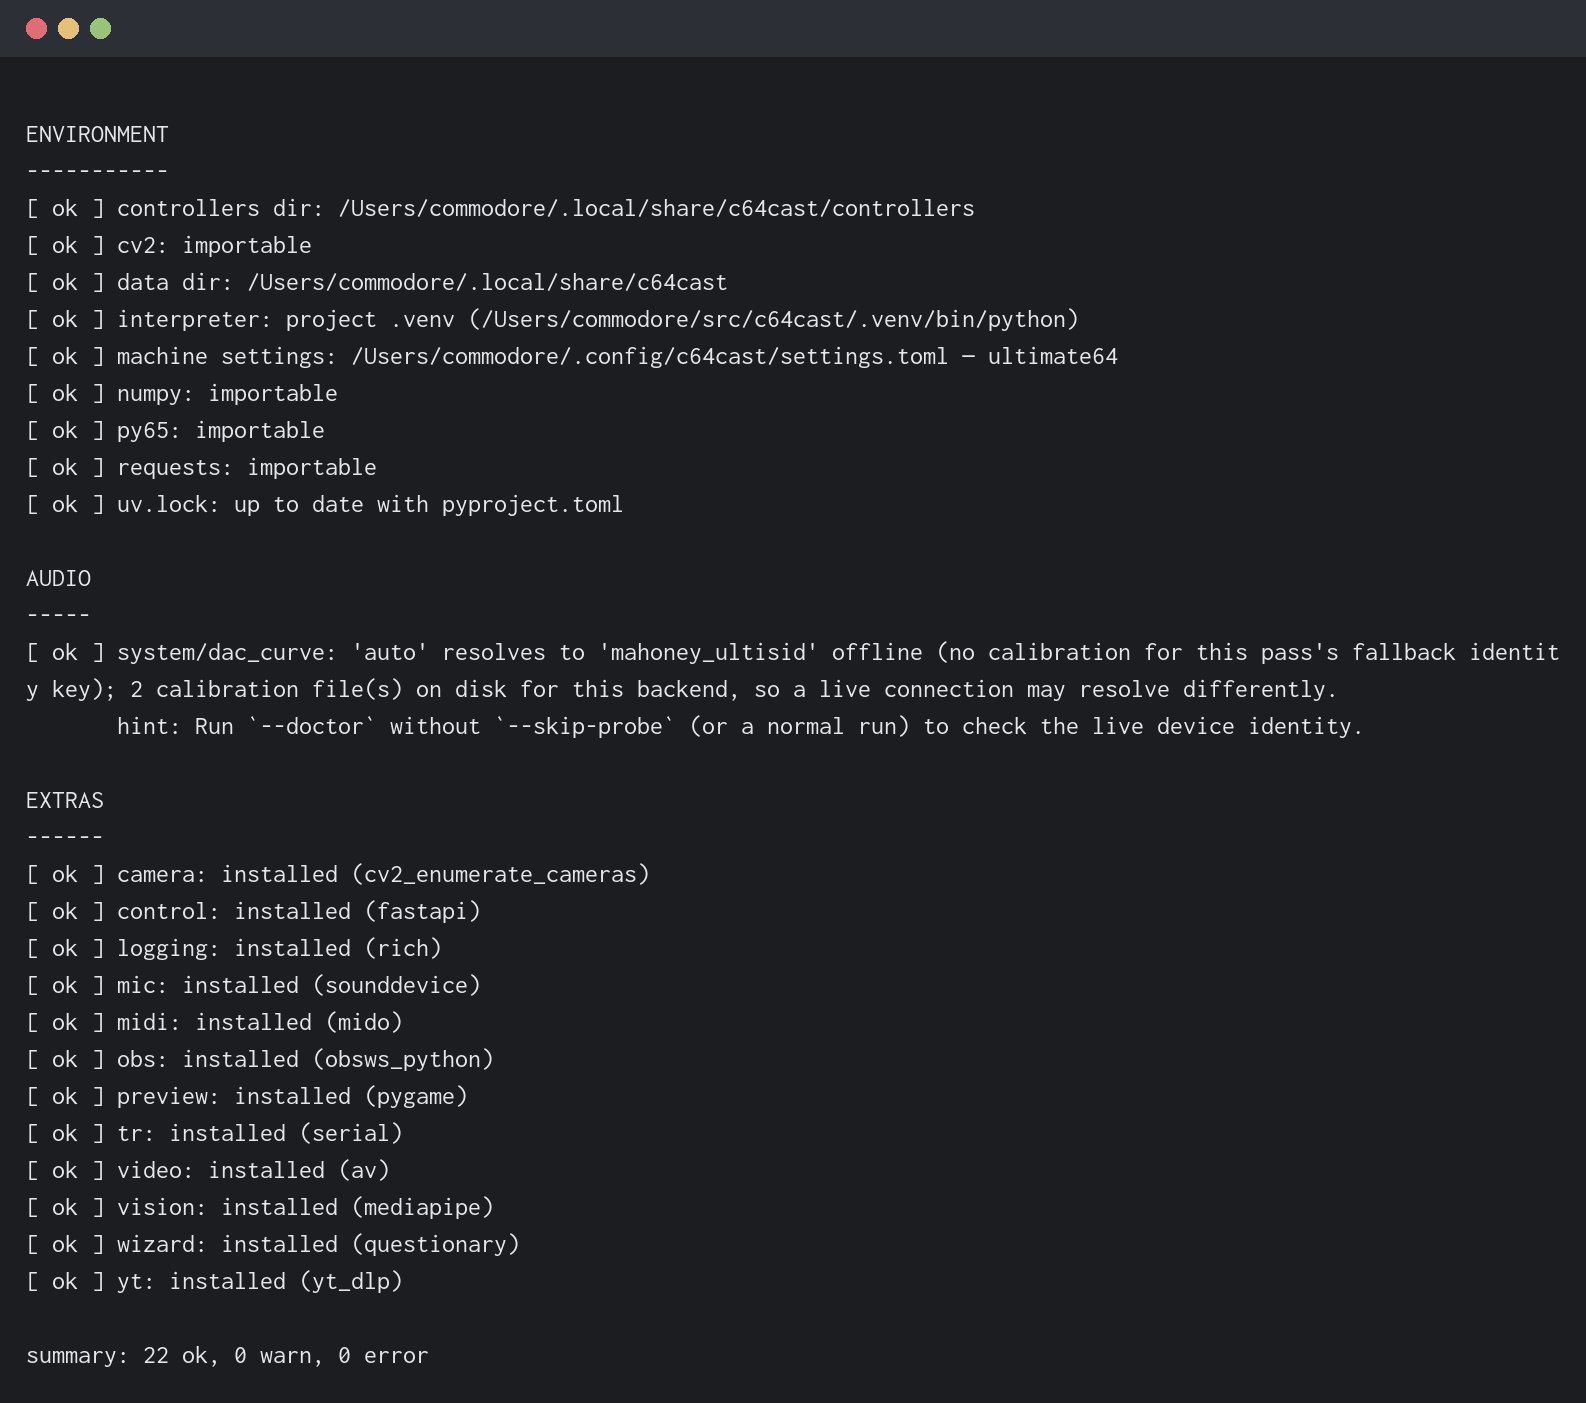
When an Ultimate answers, a line in the CONNECTIVITY section names the machine and its firmware, such as Ultimate 64-II B95B01 (firmware 3.15a build dddd29b2, FPGA 125, core 1.50). The build part appears from Ultimate firmware 3.15a onward; older firmware and the C64 Ultimate leave it out, and the rest of the line reads the same.
Add --skip-probe to run every check except the ones that touch the Commodore. This is the fast, offline version, and it is the one to reach for when you are editing a configuration file and want to know whether it is valid:
c64cast --doctor --config my-playlist.toml --skip-probeWith the services on, c64cast installed and doctor reporting a clean bill of health, you have everything you need. The next chapter puts it to work.